The QR menu is back, but the bad version of it is gone. Diners don't want to download an app to read what's on offer, they don't want to make an account before they can see the prices, and they really don't want a code that takes them to a landing page asking for their email. They want to point a phone, get a menu, and order dinner.
The good news is that this is exactly what a basic QR menu does when you set it up correctly. The whole flow - from "we have a PDF menu" to "there's a printed code on every table" - is a free, half-hour job in 2026. This guide walks you through the full setup using whew.cc, including the one decision (static vs dynamic) that determines whether you'll be reprinting table tents every time you change a price.
What you'll need
The full kit for a basic QR menu:
- Your menu in a web-readable format. A Google Doc set to "anyone with the link can view," a PDF uploaded to a free file host, or a simple page on your existing site. We'll talk about each option below.
- A QR code generator. Free, no account required. We'll use whew.cc; the workflow is the same elsewhere.
- A way to print the code. A home printer for table tents, or a print shop for laminated table cards. Either works.
That's it. No app development, no per-table monthly fee, no proprietary platform.
Step 1 - Get your menu online (the part most guides skip)
A QR code is just a link. Before you can put a link on a table, you need a place for it to point. You've got three good options, in increasing order of effort:
- Google Doc or Google Drive PDF. Open your menu in Google Docs (or upload your PDF to Drive), click Share, set permissions to "Anyone with the link can view," copy the link. Cost: $0. Maintenance: edit the doc, your menu instantly updates everywhere.
- A free file host like Dropbox or iCloud. Upload the PDF, right-click for a shareable link. Same idea, slightly less friendly URL.
- A simple page on your existing website. If you have a website, ask your developer (or your existing builder - Squarespace, Wix, WordPress all do this) to add a
/menu page. This is the most professional option because the URL becomes yourbistro.com/menu and your branding stays consistent.
Pick one and grab the URL. We'll use yourbistro.com/menu as the example for the rest of this guide, but anything works.
Step 2 - Generate the QR code on whew.cc
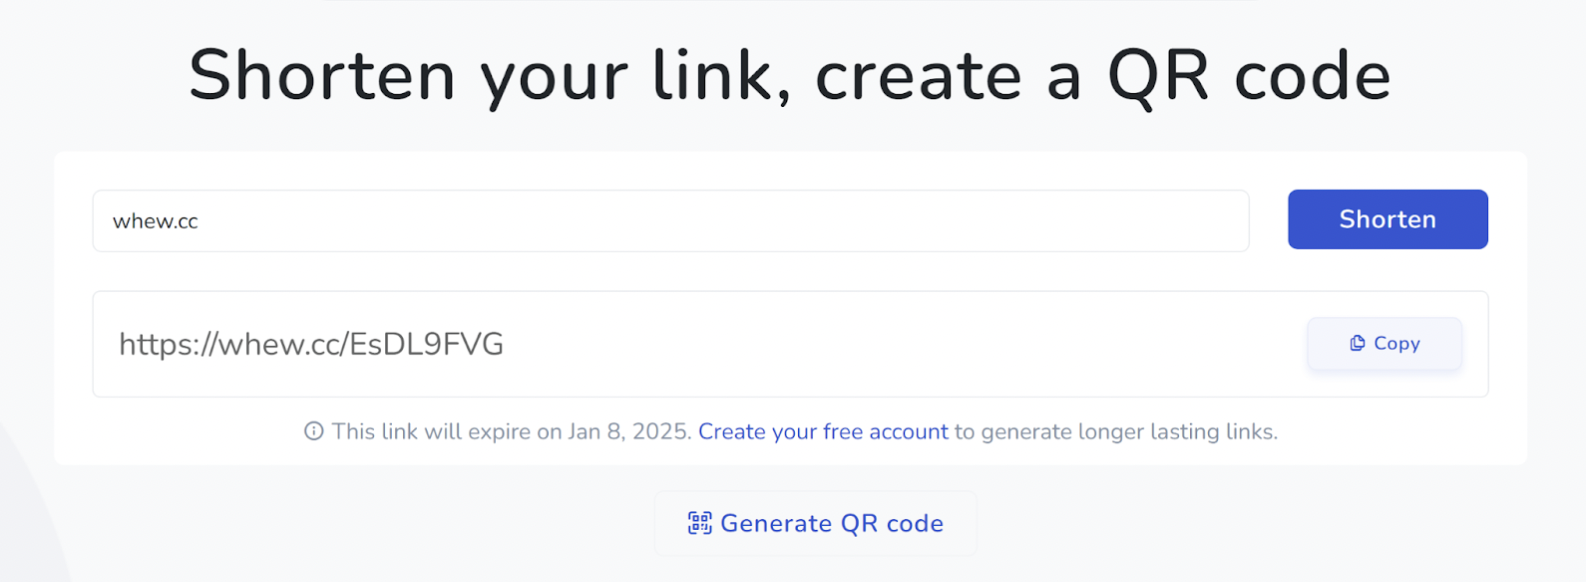
Go to whew.cc. Paste your menu URL into the input box and click Generate QR code. A modal opens with a live preview of the code and customization controls.
At this point you've got a choice to make - and it matters more than it sounds.
Step 3 - Static or Dynamic? Pick the right one before printing
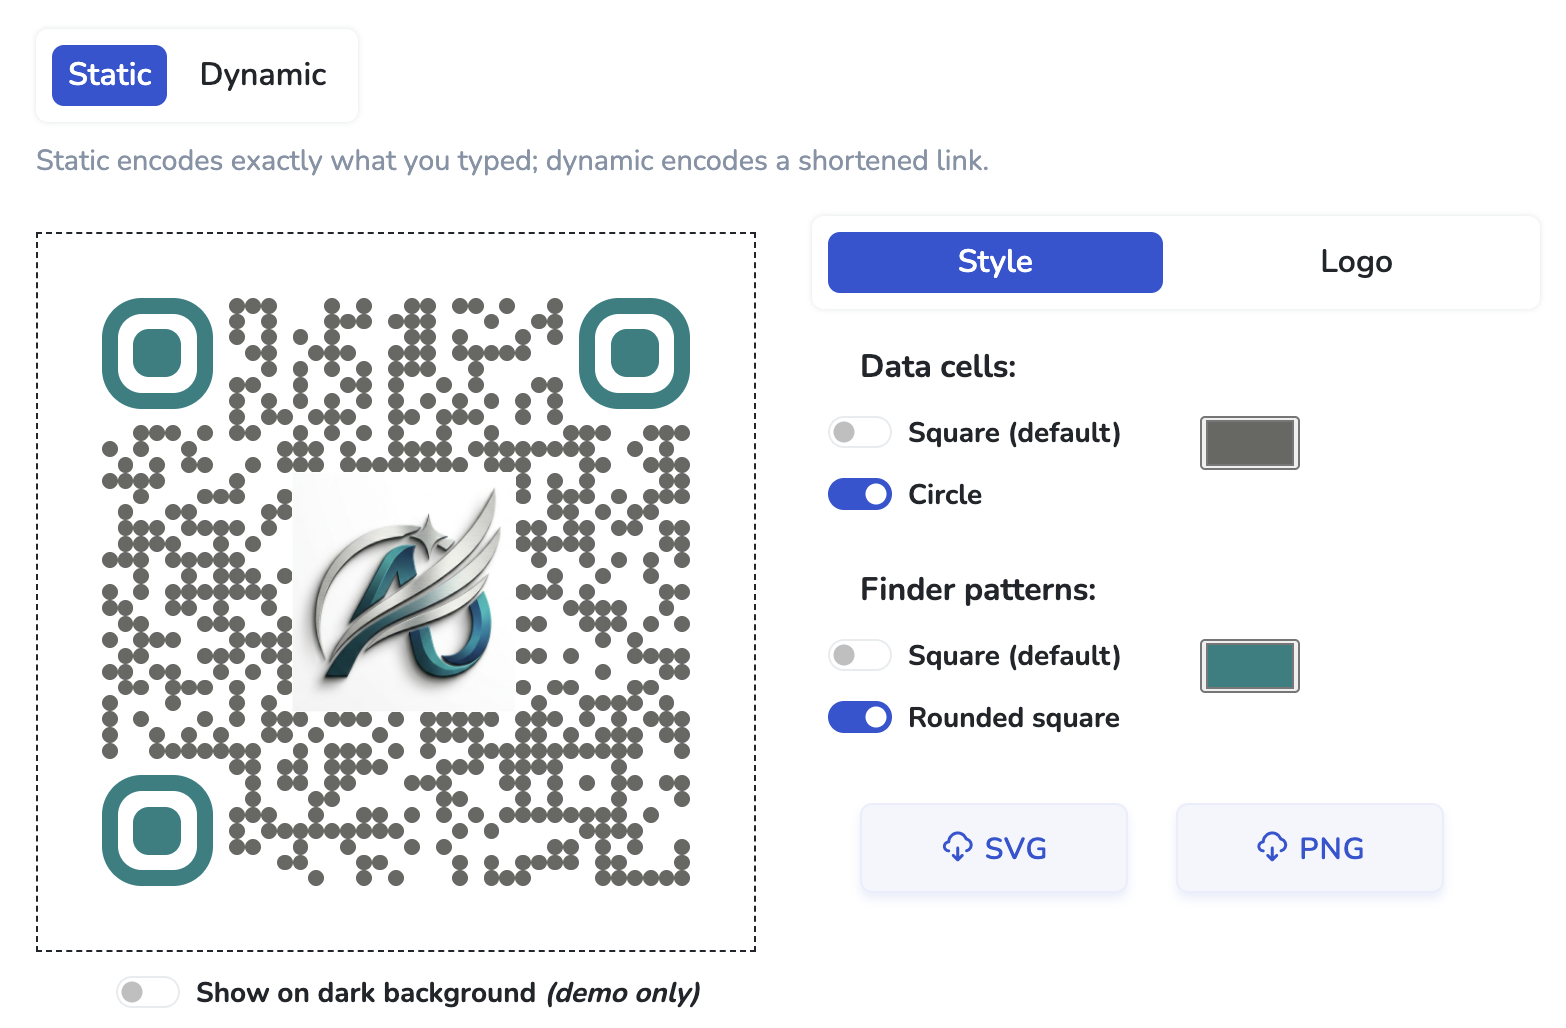
The Static / Dynamic tabs at the top of the modal toggle between two fundamentally different ways the QR code works. They look identical on the table; the difference is what happens later when something changes.

The honest summary:
- Static encodes the menu URL directly in the QR pattern. The code works forever and doesn't depend on any service. But: if you ever change the menu URL (you switch from a Google Doc to your website, you rebrand, your hosting provider changes), every printed table tent stops pointing to the right place. You'd have to reprint.
- Dynamic encodes a short link that redirects to the menu. The same printed code can be re-pointed to a different URL at any time, with no reprinting. The trade-off: dynamic codes depend on the short-link service staying alive and your link not expiring. On whew.cc, anonymous dynamic codes expire after 2 weeks, free-account ones hold for 90 days, and paid-plan ones don't expire.
The decision boils down to: how often does your menu URL change?
- Never or rarely: static is the safe, free, forever option. Use it if your menu lives at a permanent URL like
yourbistro.com/menu and that's not changing.
- Often: dynamic, and a paid plan is worth the small cost. Seasonal menus, lunch vs dinner switching, daily specials, holiday menus - if you'll change the destination more than once or twice a year, dynamic pays for itself the first time you don't have to reprint 60 table tents.
Step 4 - Style the code (optional but recommended)
The Style tab on whew.cc lets you change a few things that meaningfully affect how a printed QR looks:
- Data cell shape. Square (the default, scans most reliably) or Circle (softer look, scans almost as well).
- Finder pattern shape. The three big corner squares. You can keep them square or round their corners for a friendlier look.
- Color. Anywhere along the line between "black" and "your brand color" works, as long as you keep contrast high. Avoid yellows, oranges, and light grays against a white background - the camera needs a clear dark-on-light contrast.
If you have a square logo (most restaurants do - it's the one on your sign), click the Logo tab and upload it. The QR still scans with a logo over the center at up to about 22% of the code's width. We have a full walkthrough in our guide to adding a logo to a QR code, including the readability check you should run before printing.
Step 5 - Download and lay out the table tent
Click SVG for a sharp vector file (best for any printing). Click PNG for raster (fine for digital-only use).
For the table tent itself, the recipe is short:
- Tent size: 4 × 6 inches works well. Tall enough to be visible from across a crowded room, short enough that it doesn't block sightlines.
- QR size: at least 2 inches (5 cm) square. Smaller and phones start to struggle at typical table distances.
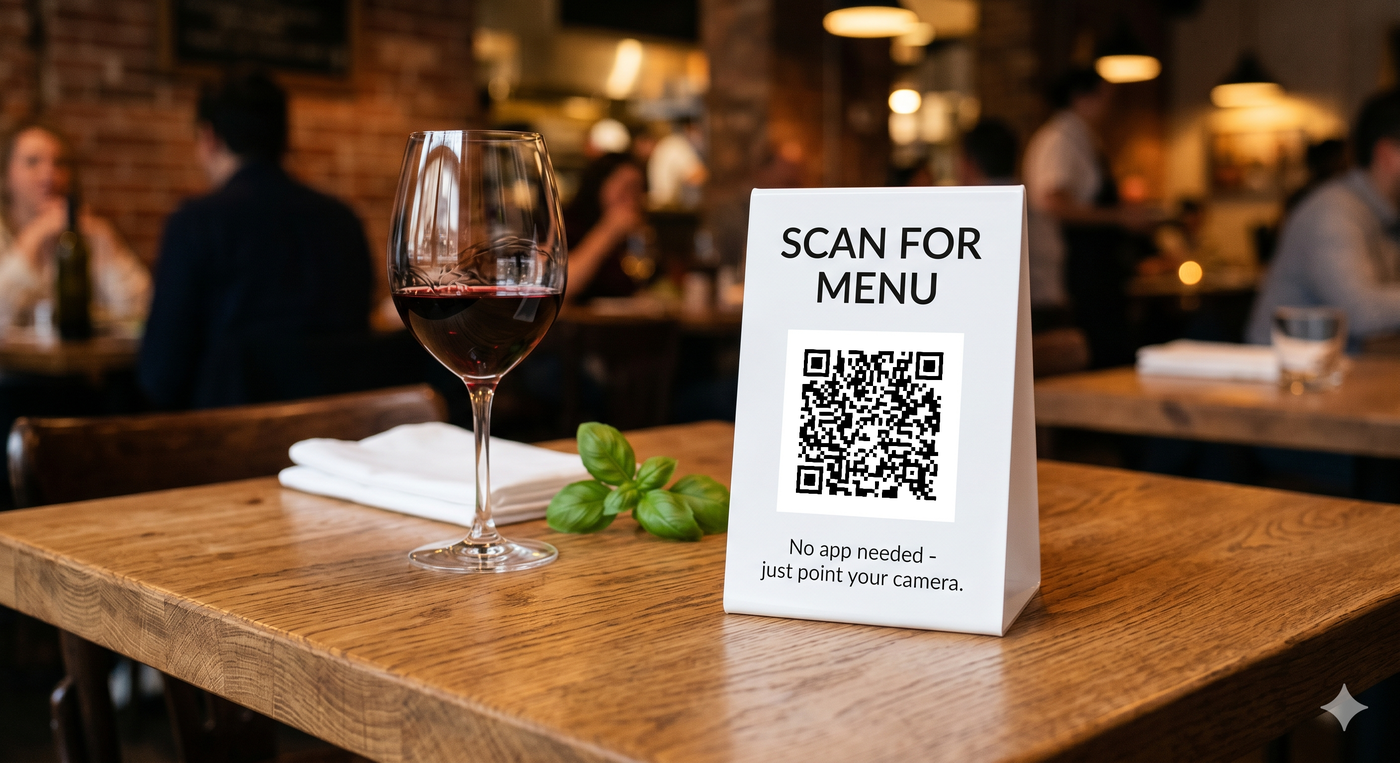
- Call to action: two short lines do the work - "Scan for menu" at the top, "No app needed - just point your camera" below the code. Diners hesitate to scan if they think they'll be asked to install something.
- Optional, but adds polish: your restaurant's name and one piece of supporting information (Wi-Fi password is a popular bonus on the back of the tent).
Step 6 - Test it before you print 60 copies
Before you send the file to the printer, run it through three scanners:
- Your phone's native camera app.
- A friend's phone running the other operating system (iOS if you're on Android, or vice versa).
- An old phone if you have one around. Cameras from 2020-2021 are less forgiving and represent some of your customers.
Scan from typical table-distance (40-60 cm), not nose-on-the-code. If any scanner hesitates, increase the QR size or improve contrast before printing. After printing, scan one printed copy under real restaurant lighting before placing the whole batch on tables.
Frequently asked: "do diners actually scan these?"
They do, mostly. The post-COVID skepticism around QR menus has cooled, and the data from restaurant operators is consistent: diners scan them, they prefer not having to wait for a paper menu, and the conversion to "I'm reading the menu" is high. The friction points that hurt adoption are very specific and easy to avoid:
- Sign-up walls. If your menu page asks for an email before showing food, scans turn into bounces. Don't gate the menu.
- Slow-loading PDFs. A 50 MB PDF that takes 12 seconds to open on a phone is worse than no QR at all. Compress, or use a real web page.
- Wi-Fi assumptions. Not every diner has data. Offering free Wi-Fi (and clearly labeling it) bumps scan rates significantly.
- Tiny printed codes. A 1-inch QR on a busy laminated tabletop card is hard to scan from a sitting position. Bigger codes work much better.
Bonus: tracking what's working
If you use a dynamic QR code, you get something genuinely useful: scan analytics. You'll see how many people scan per day, what time of day, on which device. Patterns you can act on:
- Lunch scan volumes that don't translate to lunch sales → consider a separate, simpler lunch menu URL.
- iPhone-heavy scans on weekend evenings → if your menu has photos, make sure they look good on iOS.
- Sudden drop in scans → your menu URL may have broken; a quick test scan and a redirect update fixes it without anyone re-printing.
More on this in our guide to tracking QR code analytics.